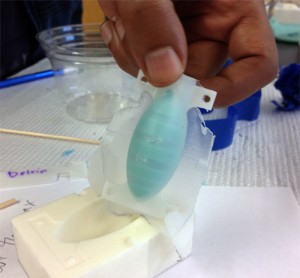
We had a physics student from Berea College, Fidel Tewolde, in our lab during summer 2013. His project was to create inflatable silicone actuators to drive our bistable beams from one state to another. With a bistable skeleton, you might be able to save a considerable amount of power by shutting off the air pressure when the actuator has flipped! Thanks to a great tutorial on printing your own robot, Fidel was able to get going fast. See the rest of this post for more photos.
The difference with our design is that we want to sandwich a Delrin beam between two silicone air chambers, while the “friendly helpful robot tentacle” has three chambers and is all silicone. Fidel worked with the lab students to create a LabView interface for pressurizing the chambers, and figured out how to modify the original design to get it to switch. The key is putting the air pocket in the center; inflation at the ends doesn’t do much to the beam.
We used many of the same materials in the tentacle tutorial, Smooth-On DragonSkin and EcoFlex. The softest materials (DragonSkin 10) were really too soft to bend the 1/32″ Delrin beam. The 20- and 30- variants worked better. Check out the process in these images:
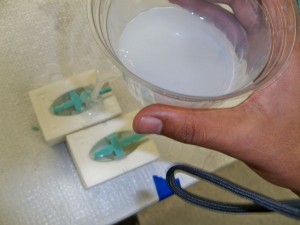
The 3D printed molds were polished “White Strong and Flexible” from Shapeways. We used Sketchup to create the design. We sprayed the molds with Valspar for casting the Dragon Skin, to reduce porosity. The wax pieces were created using a double molding process, since the mold for the hard jewelers wax needs to be flexible silicone for easy removal of the wax pieces. Those were molded using blue Smooth-On Casting Silicone that was itself cast on another 3D printed White-Strong-Flexible mold. That mold was dipped into a polyurethane coating to reduce porosity. Fidel did some carving on the wax pieces after demolding to quickly experiment with different shapes of air chambers.
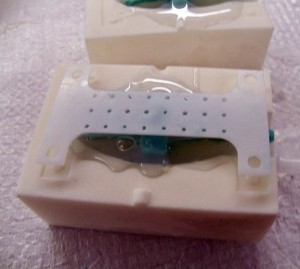
The original plan was to put a Delrin beam (here with holes to embed it securely) in the mold BEFORE pouring the silicone, but Fidel discovered that the “sandwich way” seriously cut down on the amount of trapped bubbles. The silicone is goopy enough that you can make the sandwich without it all running out. Put the two mold halves together, wrap with masking tape and wait for it to cure. Pre-cast thin silicone spacers are essential to build a solid silicone wall around the air pockets. Basically, the blue wax should only be touching silicone spacers and cast silicone–if it touches the mold or Delrin, your air pocket will leak.
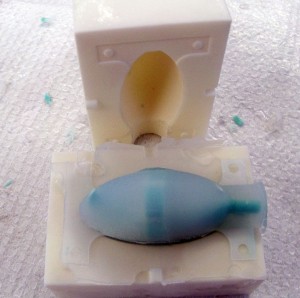
Here it is after curing
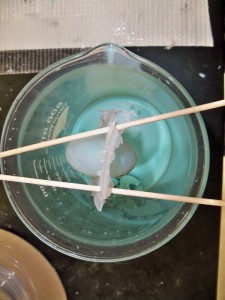
Fidel’s Chopstick Method of melting out the wax (blue jewelers wax from Rio Grande) in the 80C oven.
Check out our YouTube page for a video of a squishy actuator in motion. Next, we are working on ways to cut down on the labor by directly 3D printing parts that can be dipped in silicone to create balloons. Using sacrificial materials that can be micropatterned, and using a thin silicone or parylene layer as the balloon, it’s possible this inflatable approach could work at the microscale too.
It’s so great to see people applying some of the designs I’ve been hacking away at out there in the world. It’s also really edifying to know the tutorials have got enough info tucked in that folks can replicate them without years of head scratching and frustration.
I’d love to see more videos of the thing in action. It looks like it gets the job done. Ping me if you decide to pursue more soft robotics projects. I’d love to help other people get started exploring the technology.
Best,
Matt
Thank you, your tutorial was a very good jump start to get a student started. If we had more time or another student — we would go for a tougher material and add some levers to the skeleton to get the air pocket expanding at just the right spot. Then we could probably get a bigger actuation angle. I wish academic research papers would link over to a flickr gallery more often.
Groovy! I think there are a lot of cool places to go with this concept – the flexible sheet performing the duties of a spine turning the inflatable bladders into an actuator. Redesigning the overall shape as an inflatable cylinder instead of an elongated sphere might increase the angle of flex by distributing more force over a longer area of the spine. If you get a vacuum chamber, you can cast with a higher ratio of Dragon-Skin to Eco-Flex. I find that Dragon-Skin on its own really loves to trap bubbles, but degassing the mold in a vacuum yields some super durable bubble free parts.
I’m hoping to find better ways to share complex projects like this. I’m finding that the academic papers I read on the subject of soft robots describe their behavior in detail but don’t provide enough information to replicate the results. I’ve been trying to document as much as I can, but there’s so much work involved in making the information useful to another researcher. It’s like having two jobs, one making designs and the other documenting and publishing.
So far sharing in a blog format has been the easiest, documenting as I go, but it makes the volume of research you have to sift through to get relevant information back out pretty huge.
Again, I’m really excited to see other people experimenting along these lines.
Cheers,
M@